Hey there, Here is another easy step by step to configure your SMTP Mailer with WordPress Mail control plugin, you can follow these steps:
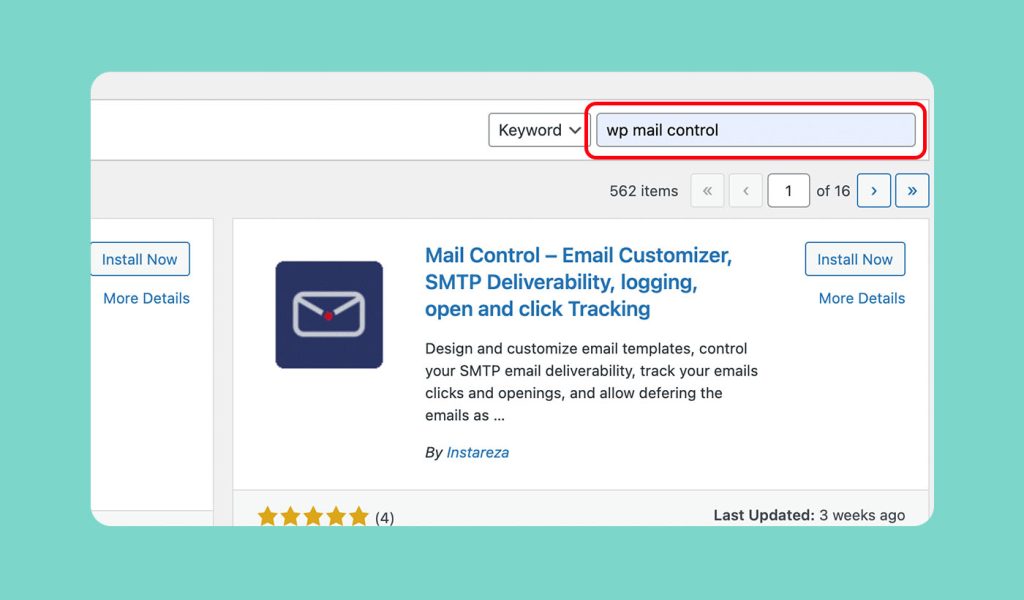
1.Install the Mail control plugin
Start by installing the Mail control plugin on your platform or website. You can typically find this plugin in the plugin directory of your content management system (CMS) or website builder.
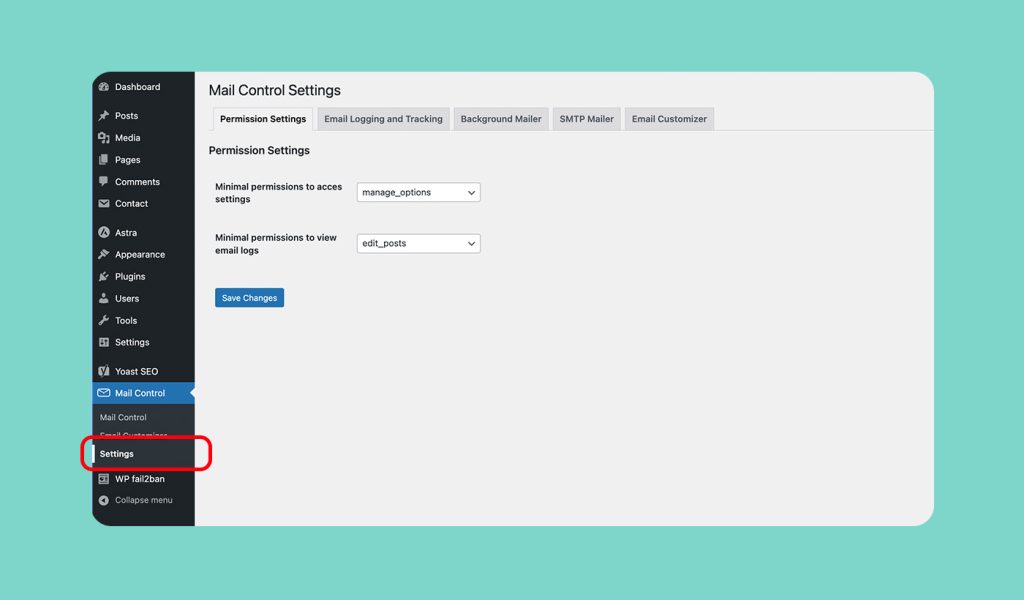
2. Access plugin settings
Once the plugin is installed, navigate to the plugin settings page. This can usually be found in the admin dashboard of your CMS or the settings section.
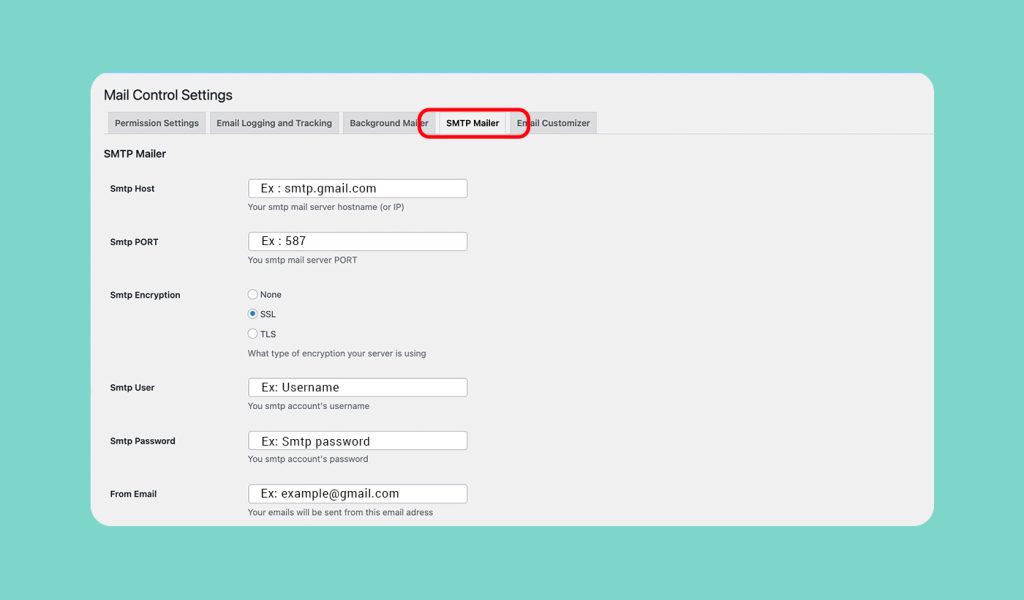
3. Configure SMTP settings
In the plugin settings, locate the SMTP configuration options. You will need to enter the SMTP server details provided by your email service provider. This includes the SMTP server address, port number, and authentication details such as username and password.
If your email service provider requires a secure connection, ensure that the SSL or TLS option is enabled in the SMTP settings. This allow that your email communication remains encrypted.
Please Check HERE If you don’t know where you can get your SMTP Informations.
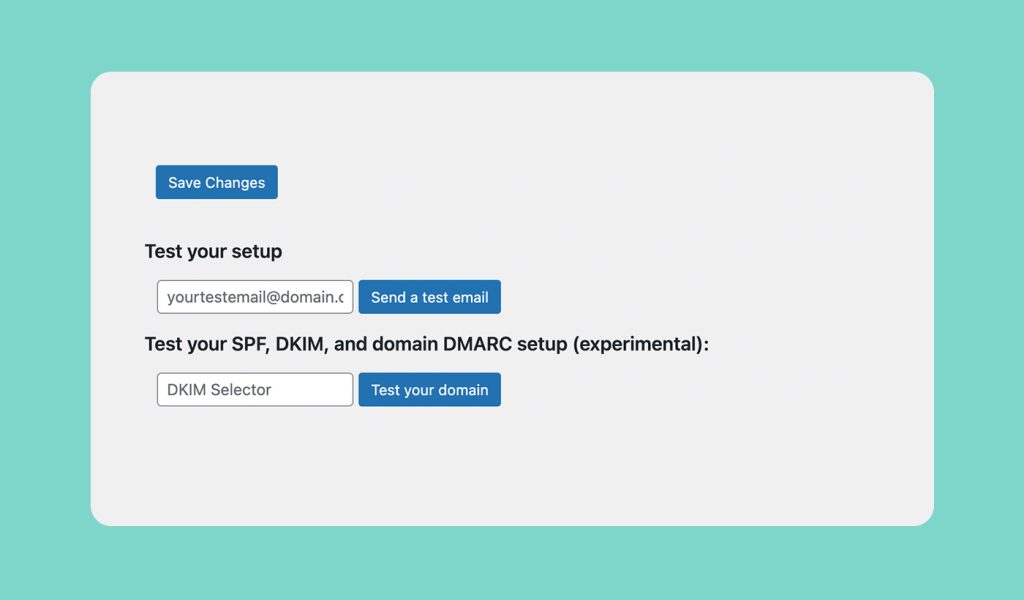
5. Test Your SMTP configuration:
Once you Configure your SMTP Mailer details, use the plugin’s built-in testing feature to check if the configuration is successful. This typically involves sending a test email to a specified address and verifying if it is delivered successfully.
6. Customize email settings
Now Your SMTP configuration is complete, you can customize your email settings through the plugin. This may include options to set your Logo brand, Font style, Content text color and much more.